Jam On It!
Every parent knows how important jelly is to a child (I mean who doesn’t love peanut butter and jelly sandwiches?), and when you run out of the sweet nectar of the gods, your child and your own inner child scream like Luke Skywalker does when he learns Darth Vader is his father. Nooooo!

In order to avoid the PB&J meltdown all you have to do is make your own and store it in the pantry. Yeah, Darth Vader has nothing on you! The ingredients are few, but the time it will take may seem like forever, so give yourself a couple of hours for this project, and although there are things your child can do, don’t be surprised if you are left working alone at times. Also very important is naming your jam, this should not be taken lightly, or you can just let your kid do it. Lighten up, it’s just jam.
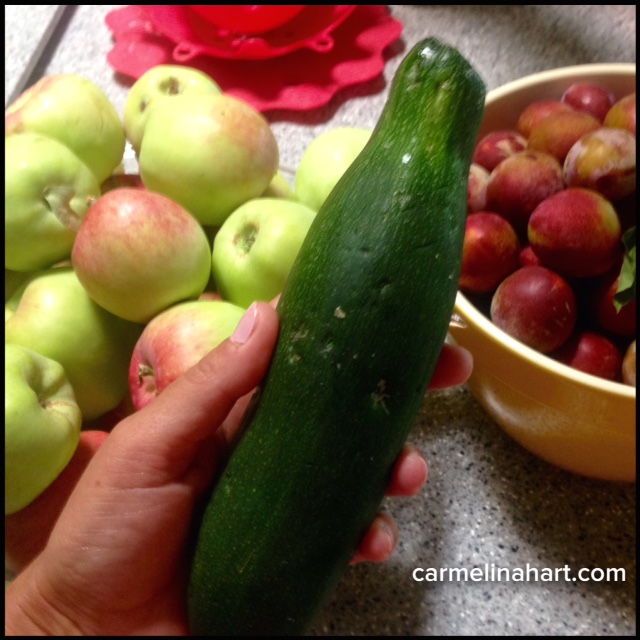
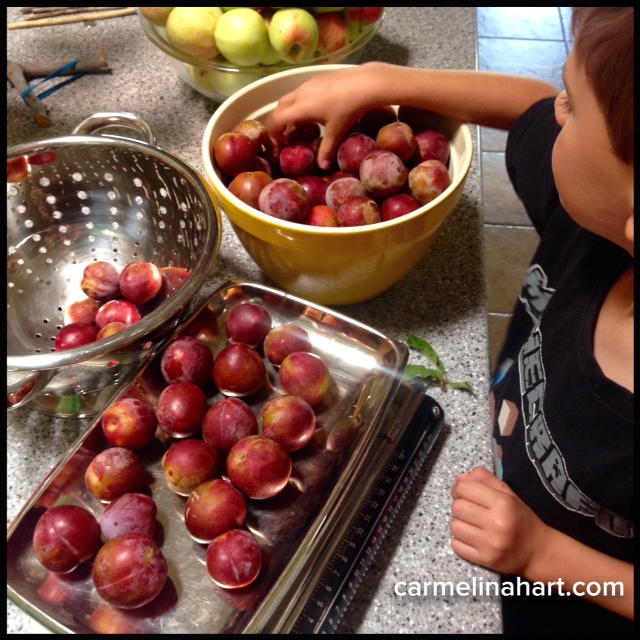
Step 1 – The first thing you need to do is obtain the fruit. For this recipe, we have used a combination of plums and apples. I’m sure you can use almost any firm juicy fruit. Really, no bananas or melons, come on. We started by trading with our neighbors, our squash for their plums and apples. Our bartering was successful, we ended up with a lot of fruit, and now ready to make jam.
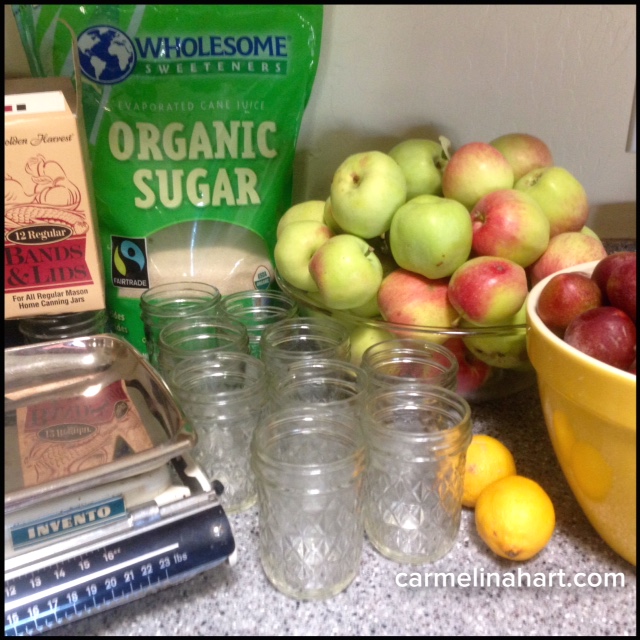 Ingredients:
6 pounds of fruit
3 lemons
6 cups of sugar
1 cup of water
canning jars and lids
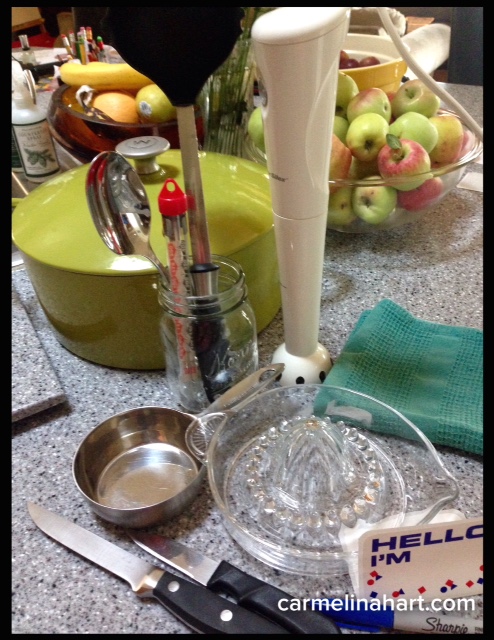 Other things you may need:
scale
large pot
immersion blender
spoon
ladle
knives
thermometer
juicer
labels and marker
extra dish towels
Step 2 – Sort and weigh the fruit. This is a perfect job for your young assistant. Azul loved it.
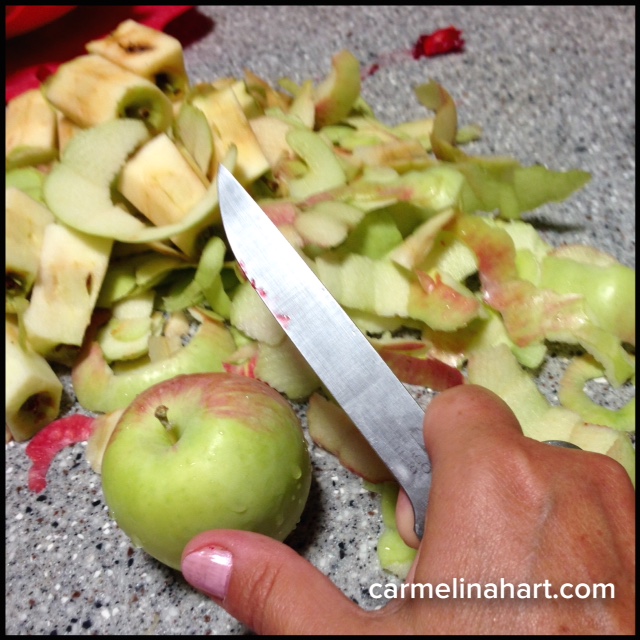
Step 3 – With your child busy with a job, you can juice the lemons and zest one lemon. Then prep the fruit. Wash, peel and core or pit whatever fruit you were able to pick, buy or trade. This job, because it involves a knife, may be best for an adult. Prepping takes some time and can be booor-rring!
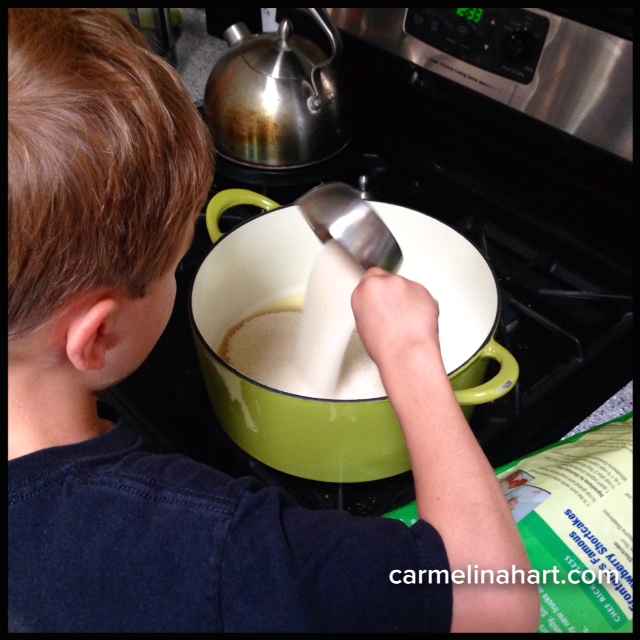
Step 4 – While you prep, your child can measure out the other ingredients and add them to the pot. Place the pot on the stove over low heat and add the peeled fruit. Cook on low heat and stir occasionally. Just remember low and slow, low and slow.
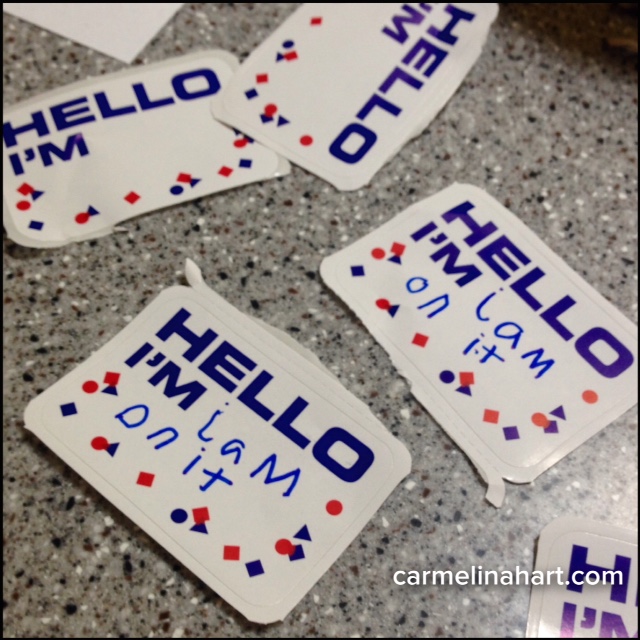
Step 5 – Have your child make the labels for the jars. You don’t have to do this, but it is super cute!

Step 6 – Once the fruit is cooked down, use a hand blender to blend any peels or large pieces to make it smoother. Now, turn the heat up to medium and bring to a boil, stirring constantly. Keep an eye on this hot liquid, there is so much sugar in it, it can burn easily.

Step 7 – Cook to 220°, this is hot enough for the jam to set. Then turn off the burner and begin to ladle “the reason you are the best mom ever” concoction into the jars. Leave 1/4 to 1/2 inch of head space, tighten the lids, place the jars on their heads, and let them cool. There is no need to boil the jars, the heat from the jam will help the lids seal.
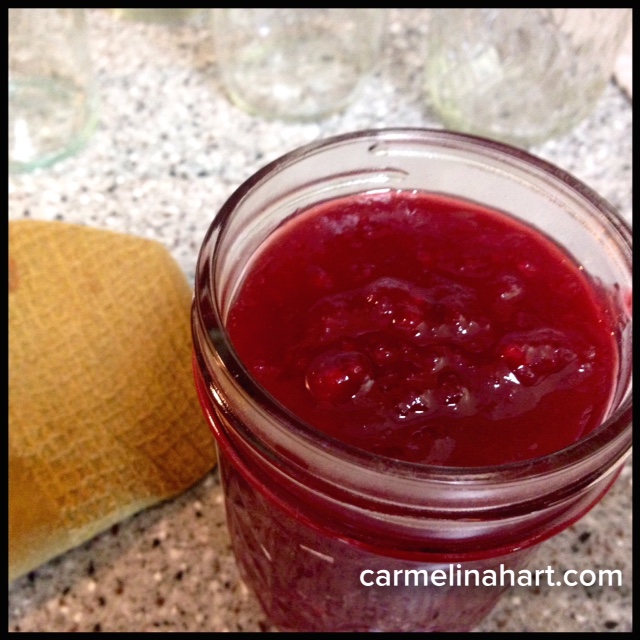
Step 8 – While the jars of jam cool, you can clean up. Yeah! Once the jars are cooled, stick the labels on the jars and place in a cool dry place or in the refrigerator to chill.
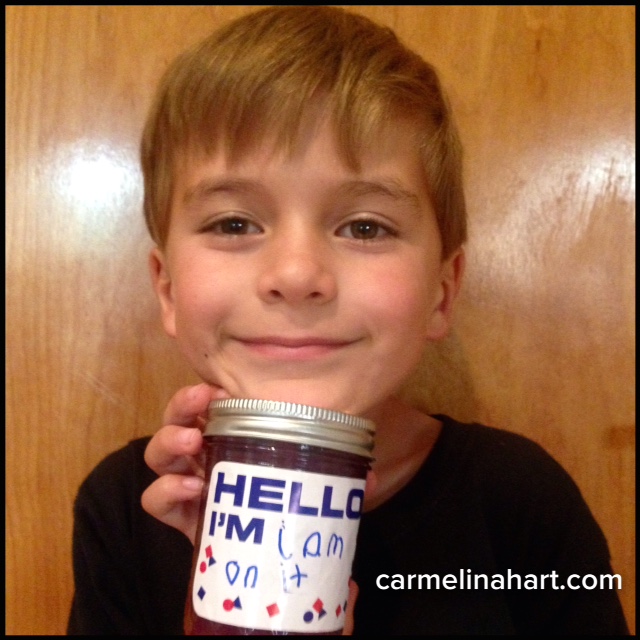
After all our work, my six year-old said, “I think it’s cool we make our own jam.” And because I am a child of the 80s, enjoy … and Jam On It!
Cinco de Mayo kids snacks: Tacos and maracas, Ole!
I have a love hate relationship with snack day. Let’s start with the hate part. I have been jealous of the moms who are able to whip up twenty or so all-natural healthy individual kid-sized fruit pies on their snack day. Ugh! Really! I usually get whatever the very capable and professional bakers at Costco are able to whip up for me. But, I love it when it’s a holiday! I’m not sure why I need a theme to get my domestic creativity going, but I do, and I feel a holiday/snack day combo coming on.
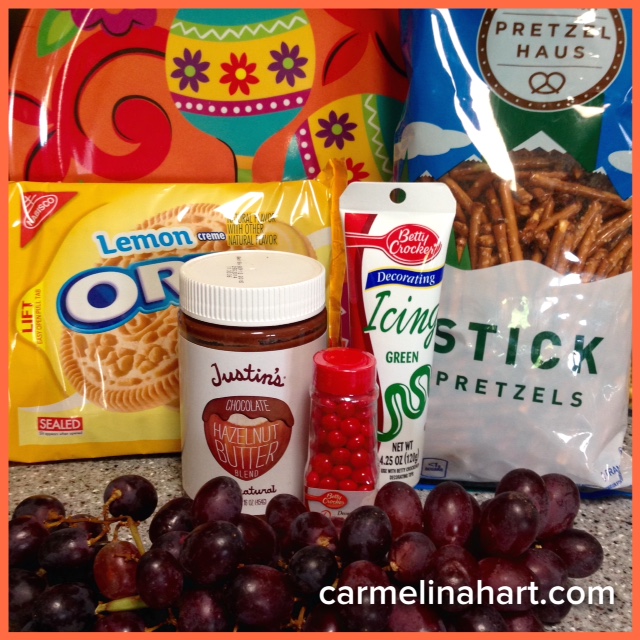
What you’ll need for your Cinco de Mayo Tacos and Maracas:
A pack of lemon cream filled cookies (each cookie makes two tacos)
Chocolate hazelnut spread
Green icing (the tube is the easiest)
Round red cinnamon candy
Seedless Grapes
Pretzel sticks
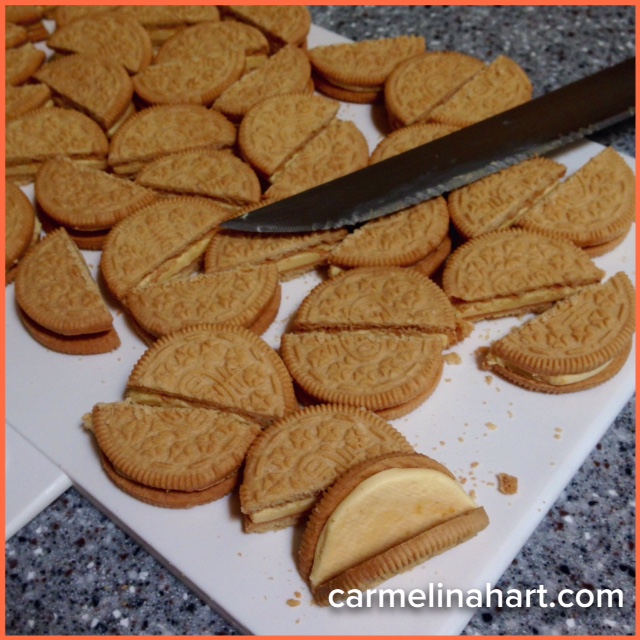
Step 1 – Start with the taco shells.
Cut each cookie in half, so they are semi-circles and are now the shape of taco shells. Then separate the cookies with a knife, leaving the filling on one side and the other side bare.
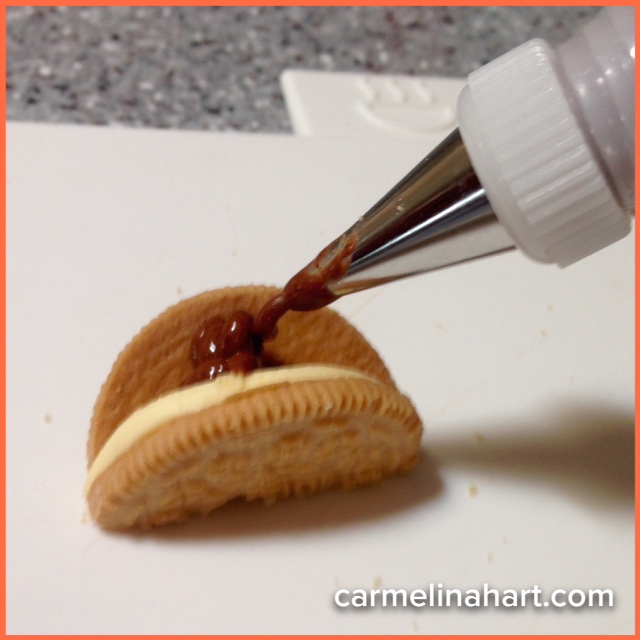
Step 2 – Next is the filling for the tacos.
Soften the chocolate spread by whipping it. This will make it easier to handle and squeeze into the shells. With a frosting bag and tip* fill the bag with the spread and then squeeze the chocolate filling in the shells. The tacos now have “meat” and “cheese” in them.
*If you don’t have a frosting bag and tip, you can always fill a sandwich bag with the spread and then cut a small corner of the bag to create an opening and squeeze the filling out through the hole.
Step 3 – Last garnish the tacos.
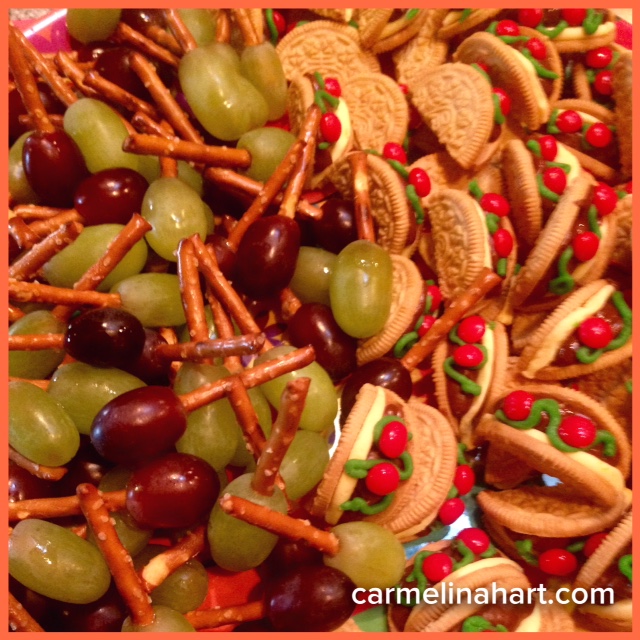
Use the green icing to mimic the lettuce by drawing a wavy line across the filling in the taco shells. Then place a few cinnamon candies (these are the tomatoes) on top. The “tomatoes” will stay in place better if the “lettuce” is a little soft. My six year-old was very good at garnishing.
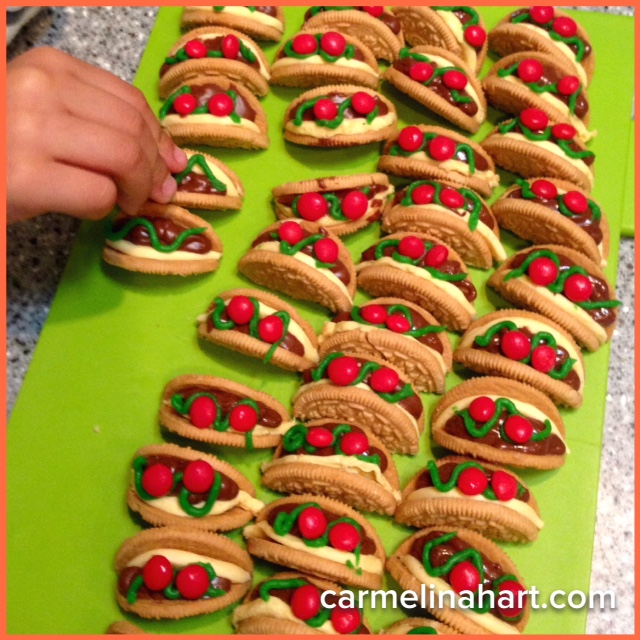
Store the tacos in the refrigerator while you make the maracas.
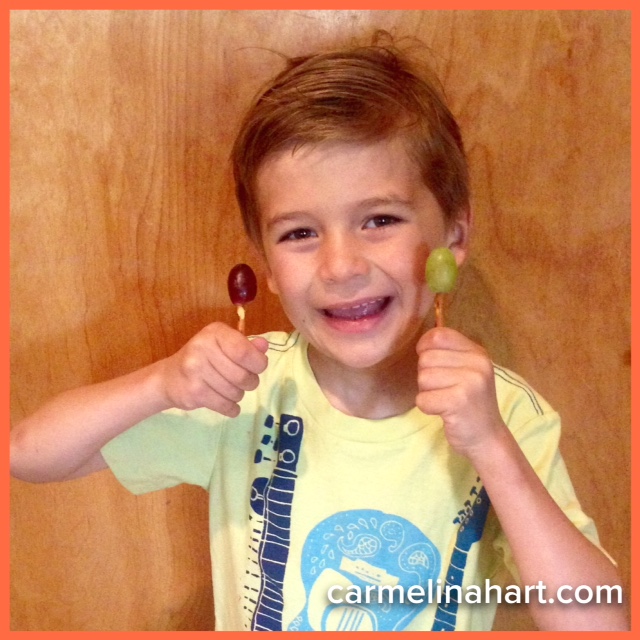
Step 4 – Time for the maracas.
Remove the grapes from the stems. Then gently push a pretzel stick into the grape where the stem was. The grape is the rattle and the pretzel is the handle (even if you try to shake them, they won’t make any noise, we tried). Then repeat. And repeat. And repeat until you have the number of maracas you want.
Now you are ready for the Cinco de Mayo fiesta para los ninos! With Azul moving to first grade next year, I bet I’m going to miss snack day, but I won’t miss the all-natural healthy individual kid-sized fruit pie envy.
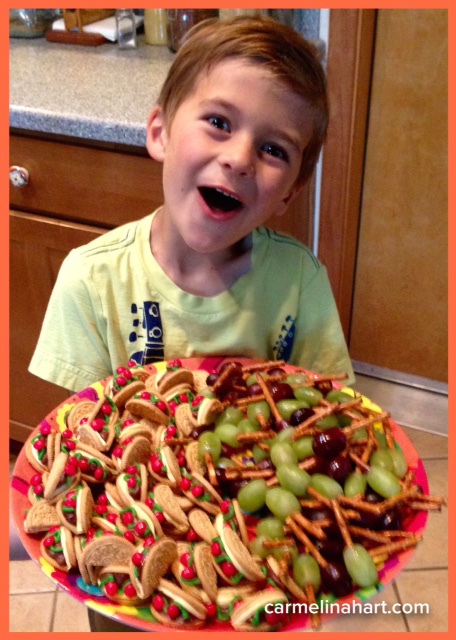
HAPPY CINCO DE MAYO!
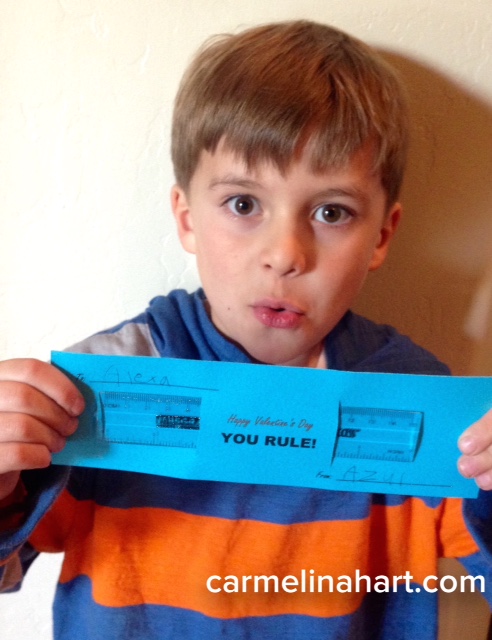
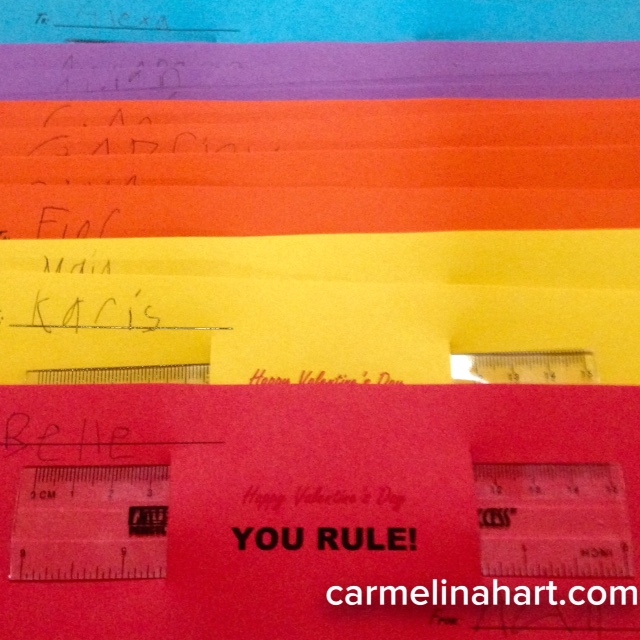
Kids Valentine’s Day Cards That Rule!
These Valentine cards will be the envy of the other parents in your child’s class and the kids will like them too. And in reality, parental envy is why we put any effort into out-of-class projects.

What you need:
1) Colored card stock 8 ½ x 11.
2) 6 inch rulers. (One for each card you intend to make.)
3) Scissors and a paper-cutter. (Scissors alone will suffice, the paper makes long cuts easier.)
4) The ability to print or hand write your super cool cards.
5) If you don’t have one of the supplies on the list, just wing it. After all, they’re just kids.
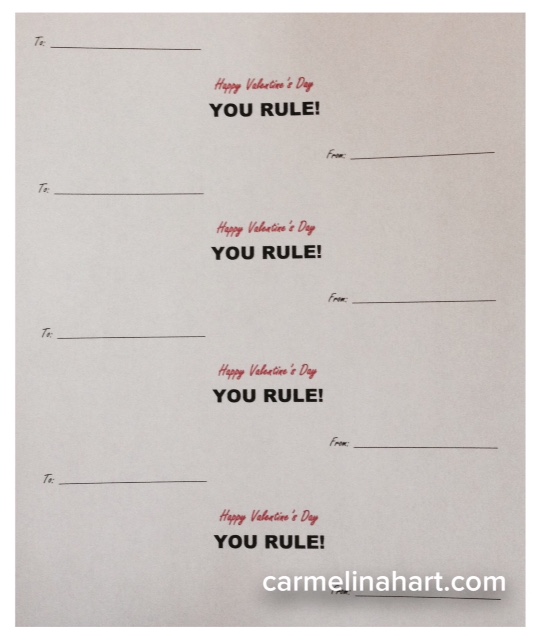
Step #1 – Print or write out your greeting, you can use the PDF above or write them by hand. Make four cards on each piece of card stock and print a few extras, just in case. If you leave the “To” and “From” blank, this will allow your child to write their friend’s names and their own name as well. Sometimes it takes kids a while to write, don’t panic, just get a glass of wine and relax. Warning: the next step involves scissors, so don’t get carried away with the “relaxing.”

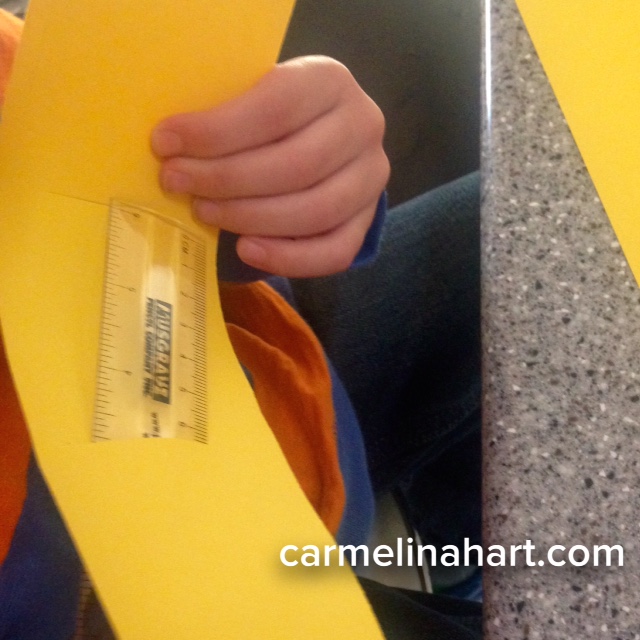
Step #2 – Once your child is done writing out the names, cut each card horizontally, separating the four cards. Next, you need to cut two vertical cuts on each side of the center greeting, about an inch and a half long. This will give you enough room to weave the ruler through the card. Your child’s small fingers are perfect for this job. There are no more sharp tools at this point if you want to “relax” a little more.
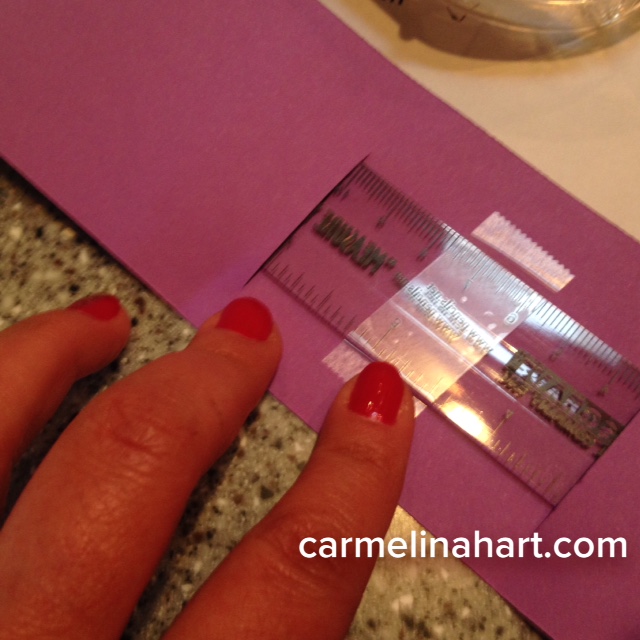
Step #3 – Last, place a small piece of tape on the back side of the card and ruler to hold the ruler in place.
All done, these cards really do rule. And so do you!
Happy Valentine’s Day and have fun.
